Thank You Boston!

28.4.15


Living in Boston on One Boston Day was an eye opener. We always notice the bad things that people do but One Boston Day brought out a lot of good in people. 
The city was  flooded with blue  & yellow Boston Strong gear.
So since the declared it a day of random kindness I wanted to participate. 

I have no clue if anyone liked these, took any or well....anything about how they went over but I did a few watercolor paintings that read Boston Strong. I placed them at Alewife station for people to grab and just said that if you take one to pass on the kindness.


Later that day I had to take off to my yoga shift....
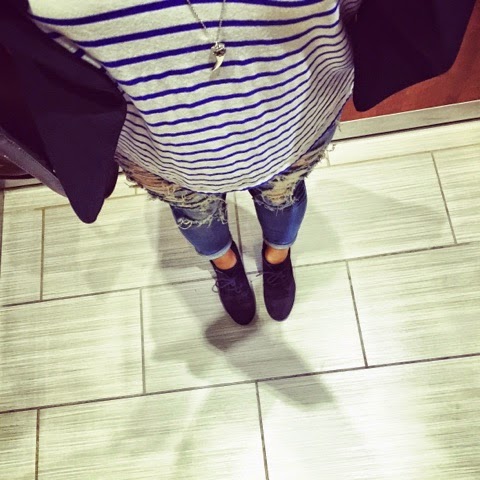
I was wearing my " Okay, but first coffee" shirt, converse, clack leggings & a jean button up shirt

Start Up Time

So as some of you know...I have a new job!!! I am super excited about it. 
I am a product developer with Launch for Jewelry Design & Wine....take note because they are going to be everywhere- you'll see. The best part is, it is such a fun, creative night out. 
since I have started I have spent pretty much most of my time working...but I love it. There is so much to do, so much I can do * so much to figure out that half the time I look up and it is 4pm! 

Passion is the difference between having a job and a career 

CLOSE UP:
Choose a job you love & you'll never work a day in your life - Confucius 

Biking into Boston

Looks beautiful, right?

right- LOOKS is the key word here....I were ripped dark green jeans, a tank tops w a long sleeve shirt over it & my converse.
I was so cold Ryan gave me his flannel for most of our adventure & since we biked in we made a pit stop at TJMAXX where I bought a cute workout hoodie for $20.00!


We love Boston incase you were wondering. 
Here is a view of when we finally made it down to the river looking over at downtown Boston.
 Biking in the wind & having no clue where you are going was a sure adventure! We can cross that off the list....
yes, yes this is what you think it is.
While we were walking through the Boston Common we ran into this little creature who was rather too friendly....a guy was feeding him right out of his hand & probably food that he shouldn't be & isn't use to eating but that is another story....

Quick Selfie
Ryan take a picture....I never said smile so this is what we left with....
Thank babe.

Another view of the Common

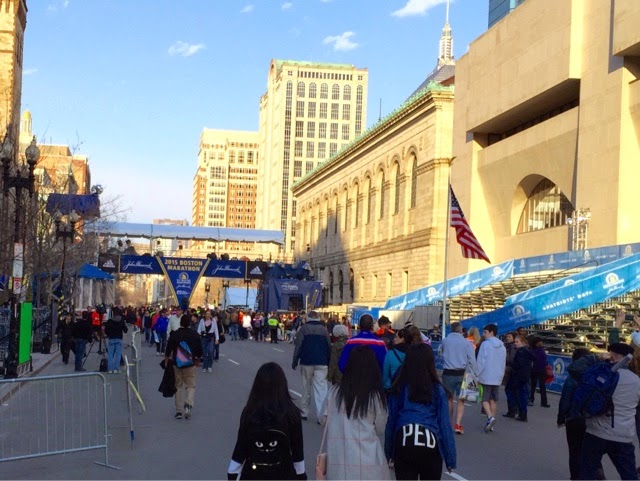
The main reason we did this bike ride was to get outside & enjoy the "nice" on the way to see the marathon finish line.
It was a bit chilling to see it all set up. This was one of the first places we meet up with an old friend of mine for dinner. We walked these roads multiple times not knowing that this is where such tradgety had happened. I guess we were naive. When we noticed that we stood & have walked this area multiple times a heavy feeling overcame us.

Well, to end this on a happy note- the people of Boston are amazing, Boston is amazing & if you have not had a chance to experience Boston- do it!
Boston has brought us so many opportunities that it is hard to keep track them all. From the little things to big career opportunities- Thank you Boston! 

DIY Fancy Abstract Art

21.4.15

Metallic is in & spending loads of money on art is out! 

Here is an easy but awesome DIY for fancy artwork. 


So, go gather your materials & let's get going!

Materials you will need:
1- Acrylic Metallic Paint
2-4 - Different colored Acrylic Paints (maybe the color story of the room of which you envision this hanging?)
1- sponge brush
-Painter's Tape ( splurge & just buy the good stuff, it is worth it)
-a painters palette is shown here...which you don't need
-a dash of patience 


Do a little bit of each color paint covering the entire area of your canvas/wood-leave metallic paint for later 

This one was ruined in our move...I took picture of it because, yes it looks like poop. 
I thought I was being clever here.... But I  wasn't. I found that I had to basically add to adjust all the precut tape ...
Song started by just going along on side spacing it out, keeping even spaces. 
To be honest, I eye ball pretty much everything. After realizing my pre-cut tape wasn't going to work, I just went for it. I added length where I needed it and took it away from where I didn't. Eventually I got this. 
Now, first press down all your tape making sure it is goo to go. Once it is. Squirt a bit a tour metallic paint over top and cover it all using your sponge brush. 
Depending on how you want your metallic look, you could do a light (one base) coat or have a heavier metallic look by doing more layers of paint. 
Give it a good hour or so to dry to be sure. All dry? Great! Go ahead and take off all the paint. 
I added eye hook and wire to the back to make it easy to hang. 
Bam! Here it is! All fancy looking and hung up! 
What colors are you going to choose for your fancy art? 

Simple Command Center

17.4.15

You don't need to have a large family to have a command center! Although if you do have one, I highly recommend having one!

Organization items can get expensive- 
& fast! Create your own command center by using items intended for other uses...& scope out the clearance aisles at Target & TJMaxx/HomeGoods!! 

Luckily my mother in law had given me the chicken wire memo board...

but lucky for you I love to DIY and happen to have chicken wire and wood laying around my storage closet (which really should be our guest room closet, but I took that over before the mover even brought my stuff!) 
So here is how you can make one of you have the desire to DIY or can't find one that doesn't cost you more then $30.00-I wouldn't pay more than $25.00 personally.

GR! I had typed this entire blog & when I came back to publish it, POOF! GONE! Sorry, just had a flash back because it happened right around here.

Okay, so I set up my little make shirt work bench so I could cut down my wooden boards.

Once they were cut I placed them in the order, shape I had pictured in my little head....
luckily they worked! 
& yes, I did this DIY in my Pjs :)

Okay, now to hold your boards in place you might want to add a staple across the seam of where to boards meet. Do this in each spot the meet. 
The staple is NOT meant to act as the main support! 

Chicken wire time- BE CAREFUL THIS SHIT WILL CUT YOU! :) 
Spread the wire out across the boards to see how you want it to fit over the back of your boards. 

You got it? Okay, now you want to clip your chicken wire...this is mainly where you want to be careful with the whole cutting yourself deal.

If it fits, staple it! Staple it wherever you see fit. I started in on e corner and worked my way around the wire edges making sure it was snug against the back of the wooden boards. 

I had about 5-6 staples on each side.

BAM! Here it is. Since I used old boards....ya know those ones I used for our headboard, turned coffee table, turned blanket ladder & now Memo board.


Okay now the wire baskets.
If you are feeling super crafts and didn't cut yourself with the chicken wire from earlier you could always make your wire baskets using the extra chicken wire. Be careful! I made a lamp shade once and let's just say, I'll never forget it! You can make your baskets whatever shape or size that flows solely with your command center space. I purchase two baskets which wer made to hang inside a cabinet but they also hang from eachother perfectly!
I broke off the top baskets brackets-I am the hulk
& I just hung the bottom one from the top.
 You could always leave the brackets on and do a cute "curtain" rod look but with your baskets hanging. 

Add a fun little quote sign or cute picture frame.

 Due to our space I have a chalk board/key holder near out door.

 If I had a larger wall it would all be together. 

An easy yet super cute way to have a dry erase board is to simply use an awesome frame with some patterned paper inside. 

There ya go, hang it where you want it and you have your very own dry erase board-that is actually stylish & didn't cost an obnoxious amount! I used out near out guest room for our internet password....guests love it! 

Below I used the shelf we originally built to store our DVDs but our collection has out grown this shelf...reuse! Works perfect as a little shelf to hold random items like Ryan's work badge & Little note pads along with shoes on the bottom two shelves. 


Share your command centers along with any of your own hacks! 

Kimonos and pillow cases

16.4.15

Unforunately there is not a close Joann Fabrics around me :{ (major sad face) so I used my back drop fabric for taking photos...because I love it!! I also used some very old fabric left from when I design a bra for breast cancer back in like 2008 I think? Not sure but the bra raise $10,000 so that worked out .
Okay back to DIY Kimonos....

Originally I was going to do a complete step by step DIY on this...than I found my dream job and have become rather busy so I still wanted to share this...if you are a visual person this will be perfect! If you need step by step-sorry peeps. Now that I am a workaholic I do not know if I'll be sharing many step by steps. BUT I have be sharing sneak peaks at our designs and upcoming projects! 

Scroll down to see how I made my kimonos ...and a pillow case! 
I also made two more using these materials. They we over sized scarves! I do not have a photo currently but trust me-they came out awesome! 

That's all folks! Check back soon for a behind the scenes look at the photo shoot for our upcoming projects! I had the chance to model my own designs- how friggin awesome! 

Happy Thursday! 

Made With Love By The Dutch Lady Designs