Long awaited Europe trip...

2.5.14

 This past March we took a two week vacation to Europe and Montana. We had a wonderful time of course seeing new places, struggling to find our way, searching for something to eat besides carrots, bananas and nuts and enjoying the company of terrific friends. 

We were a bit scepitcal about the trip to Europe since we bought it off Groupon and the company was called Gate1Travel. It was not until we arrived to Budhapest and were with our group. That first night when we realized this was going to be freaking awesome!!! (Besides me being starving and unable to understand anything in Hungarian) As our tour continued our awesome experience did as well. 
Ha Ryan had an intense black eye for most of our trip and saw himself in the camera....he got clocked with an elbow at basketball a few nights before. 

A beautiful, amazing and historical cathedral in Budapest 
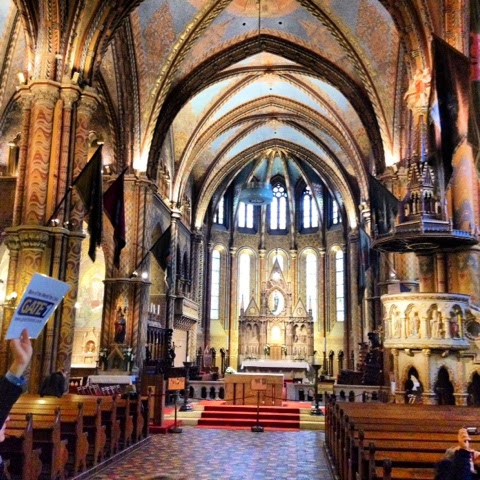
The inside has change over history so many times depending in the religion of the time. Currently it is catholic and it was purely amazing to see all the hand painted murals that cover every inch of the walls. 
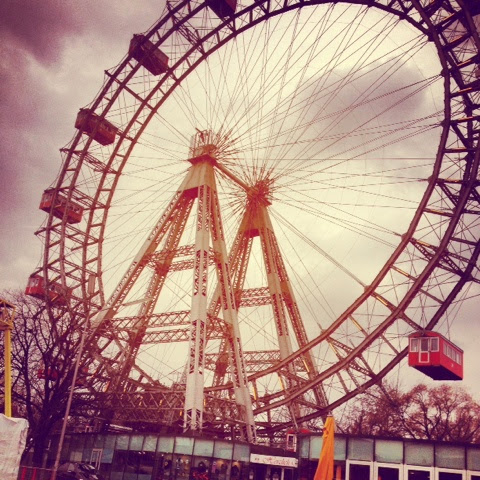
The oldest Ferris wheel is also in Budapest ...the walk there was never ending and the park was rather CREEPY!! We walked everywhere we went that wasn't with the tour. I do t think my legs have ever hated me more and my feet I am pretty sure tried to kill me with pain, numbness and smell ....not gonna lie. 
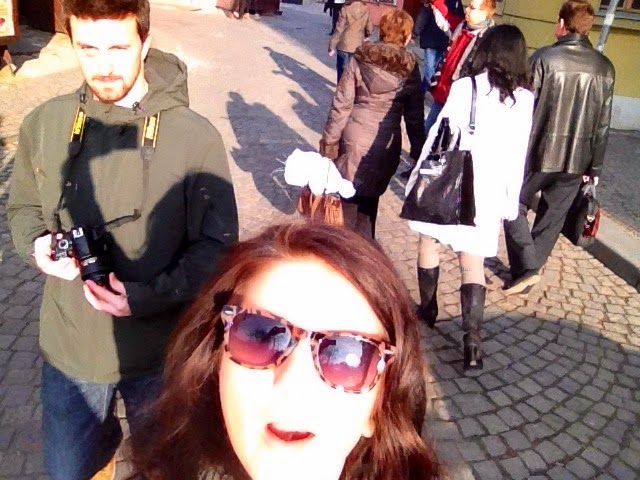
And to introduce our favorite place we have been yet ....Prague. It was beautiful weather ...we locked out we were told. Normally there would have been snow covering the city but fortunately we left all the snow back home in MN...where we still have it by the way! This photos is from 4-17-2014 
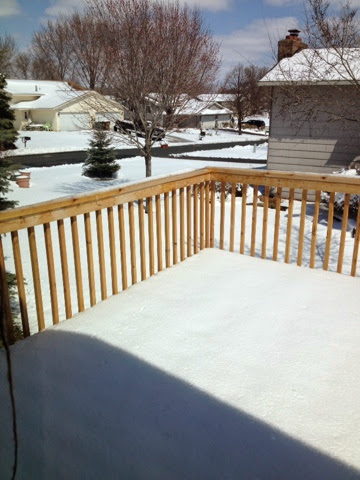
We had a nice storm that brought us 8inches and an 1 1/2 drive home :) anyway back to our trip...we have heaps and heaps of photos that I can not, well will not sit here and write about each one so here are a few more... 
 
Awesome place for gluten free! This was my first place that I truly or to eat a meal and have a pretty dan good beer! Highly recommend it! U'fleku I believe it it was called 
The. We hit Big Sky!!!! 
What a good group! 
These two....they brin these pants everywhere ...got to love them! 
Well that was our trip in a nutshell without getting too boring or detailed. I'll be posting some projects and pictures of the house this weekend. 

Happy Thursday!! 

Front Entrance Nook

2.5.14

Closets are a place we clutter and a space to hide things...we wanted to start off avoiding that by creating a nook area to sit and store our shoes, jackets, keys and bags nicely. After pinning everything nook idea I liked on to my Pinterest we finally said..ah, we're doing our know.
So we did this without having to knock out any walls or ripping up anything besides the trim boarding the floor.    
Here is before:  
Ryan took of the bifold white doors before I got the picture (not complaining at all!)  
Screw in four 2X4s in the corners 
Add another 2x4 across the from and back 
We bought a stron but thin wooden board and cut that down to fit at the bench sit. From JoAnn Fabrics we picked up 3inch foam...you could easily use 2inch. We winged it and should have prob went with the 2inch. We choose a burlap fabric that has a simple black altering chevron pattern across it. After barely getting the fabric to cover the entire seat we put the stale gun to work. Love my staple gun!!! We stretch the fabric probably a bit more than we planned and should have but it turnabout great! We didn't factor in the thickest if the foam when we got the fabric cut :) oops! Oh well, now we know. 
  In the meantime, Ryan added more 2x4s vertically across the opening aloh with smaller 2X2 boards on top for a bit more hieght.  
We feel inlove with the idea of covering a wall with wood the second we saw it. Although our original idea was to used old unwanted palettes we soon realize that not only was that time consuming for multiple reasons (searching for them, contacting the people, getting them, taking them apart and denailing, sanding them and lastly staining them. So we came up with another idea, wood shims. Cheap enough, stain nicely and no taking out nails and staples! 
So on the one nice day we have had in about 6 months...I got out early In te mornig to start staining! The window panel and legs are for our DIY coffee table. 
After staing and spraying them all with a sealing spray we started nailing them in with a nail gun. Luckily Ryan's brother, Shawn has a large amount of tools and is nice enough to let us borrow them:) Thanks Shawn! 

We added the bottom boards first before we screwed in te hinges or bench sit. 
Hinges in and within seconds Ryan was already cleaning up...he is a bit of a clean freak wen it comes to stuff like that :) we added hinges so we could open the bench and store shoes, maybe add a basket for socks or gloves. We will be adding a dividing board in the middle underneath. Back will be storage and front will be a rock bed for shoes. Living where there is a rather large amount of snow or water on the ground most of the ear we wanted something and somewhere to keep all of our wet shoes. 

Until we get to finishing it this is where we are at for now minus the mirror and hooks we have added since the picture. 
Finished product coming soon (I hope)!!! 

Small DIY projects to add a little spark to your home

1.5.14

Fancy up the Bathroom with paint, trim and color....
We used valspars Bleached Snow for a grey toned wall and I couldn't be happier! Love the color! Add the to small space without taking away or making it feel any smaller than it is. Next came the mirror...hated it. So we framed it with two types of wood: 
Bam! To me it is a huge difference and soooo simply! Just try to not to take a hot shower shortly after so the glue can have a chance to dry :)...we found that out the hard way! All of this cost us less than $20 and no more than 20 minutes :) 


Easy and cheap way to add a quote, phrase or words to your wall... 

First I found the quote I wanted to use and picked the spot I wanted it. I choose our bedroom near the closet so you could see it from out door. Being crafty I had white sharpie poster paint markers so I used those until they ran out then bought a new one...I recommend that if you are doing this to just but a new one so you know that the paint it fresh and is all the same tone  :) I also had cardboard sentcils stores away. I knew I would find a way to use them!! I choose all the letters I wanted layer them all out in the floor to get an idea. I used painters tape to put them up on the wall and did all of the last letters of each sentence first and went on from there to keep things straight. 
After tracing each row I went back to the left hand side and filled them all it. 
 
This is when my first paint marker went out .... 
And the final project turned out like so...

We love it! It is time consuming but way cheaper than buying a wall decal. Also you get a little feelin of ahah! Look what I did :)  

That's for the recent smaller DIY projects! The front nook comes next.... 

Again, Happy early Thursday! 

Chevron command center

1.5.14

I love having a command or communication center!! Although there are only two of us...we are on completely different schedules and it is nice to have everything out all the time but organized and well...pretty looking! I have a few things to add and tweak here and there but otherwise this is it: 
 
Since this photo was taken I added a clip board with a calendar. 
Here is the process... 
After making sure he wall was all clean and the outlet plates were off I measured and cut the wall paper. This chevron pattern is from Targets collection of Devone color. Simply peel the backing and stick on the wall. They have many other patterned wall decal/paper options along with matching paints. 

Love the way it makes our kitchen look!! 

Happy Early Thursday morning! 
Made With Love By The Dutch Lady Designs