Iguanas Are Gross!

31.3.15

Anyone else agree with me on this one? Iguanas creepy me out! So do bearded dragons, komodo dragons, those little lizards that try and take over FL yards! 

Okay, so now that I have those creepy little creatures in my head I will move on & show you my new piece...
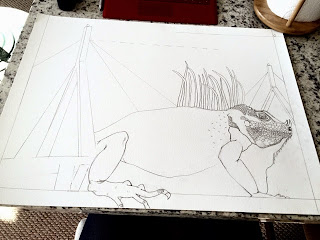
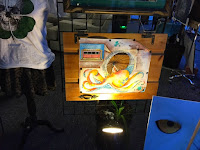
The Iguana Bridge! 

So for anyone that has ever flown into Boston's Logan International Airport you know that leaving (when you aren't use to it) it just a strange struggle. Luckily Ryan was driving so I has the chance to take all the scenery in. This is the first time I notice the
Leonard P. Zakim Bunker Hill Memorial Bridge
& thought of using it in artwork. 

After many sketches and tweaks, I finally came up with a combination of the two objects. 

There are some pretty cool paintings of iguana out there so if mine really isn't your thing be sure to check out other artwork! I found tons through yours truly, google.com
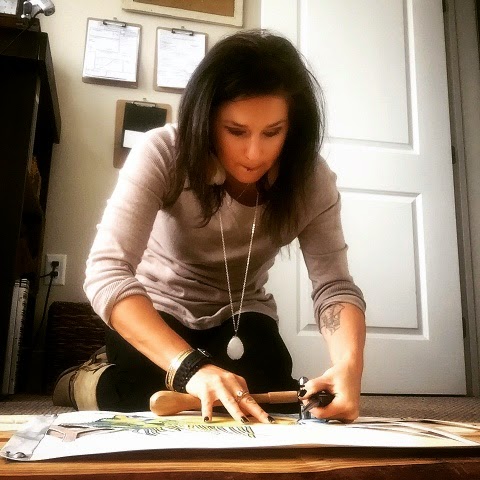
Ryan was concerned that people would wonder who took this photo....I doubt that is what any of you are thinking but if you are concerned I used my timer on my IPhone 6 and 
leaned it against something :) 
BAM! 
A photo of my working!! 
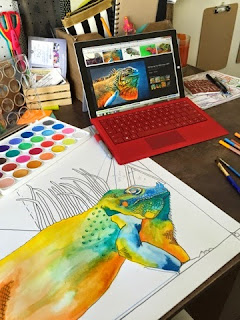
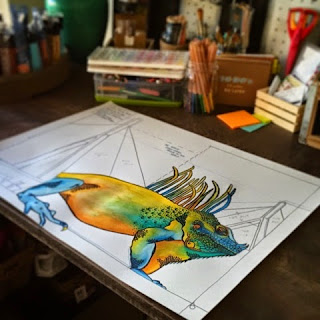
So normally I used water resistant, smear free black ink pens of various sizes to do my outlining and touch ups...it is just my style I guess. This time I switched it up and did black watercolor as the outline. I don't think I will be doing this again on similar paintings of this style due to the next few steps I do to create the back ground. No worries- now I know!

Here is a close up of the detail. I didn't want to do a complete scale look to keep the focus else where.
Luckily I glued the reclaimed wood background together the other day. So once the painting part was done I was all set and ready to start nailing! The lady that lives below is probably hates us. I feel terrible but I also need to get work done! I always wait until the afternoons :/ hope that works!
See, self taken photos with the wonderful timer option on the IPhone 6...whatever it works fine for now.

I incorporated the same nailing with wire/string as I did in my Octo-Wheel 
(that is currently hanging in the entry way of 
Out of the Blue Art gallery & More in Cambridge off Massachusetts Ave) 
 There it is as you walk in their front entrance. 
This time with this look I used silver thread instead of wire. I wanted a more subtle look. 
As you can see, you know that something is there but it doesn't take away from everything else that is happening in the artwork. 
Here is the other side. This side is why I didn't want to use thicker wire. With all the detail in the face, I felt the wire would  be too much. 

& here is the final outcome!

As always, I would love to know what you think. I am open to criticism as that is what will make me better. You can view some on my painting inspirations here on my 

Be happy! 

Extending to Interior Decor

24.3.15

After much thought, reading, research and talking to myself into it....I have decided to extend Brushes & Bolts into interior decorating. I have heaps to figure out still...like actually making this into a business. On paper I may not have the most experience but I do this work daily. Every space I enter my mind just starts racing with ideas- sometimes I wish my mind would just rest! 

I absolutely love moving items around, changing up spaces, creating happy environments, finding salvage items, using unexpected items in random places and incorporating reclaimed items into rooms. On top of all that- I love the challenge or creating something special and unique for someone. Making a persons vision come to life and providing them with comfort and happiness in space they can enjoy daily just seems to be the perfect way to use my creativity and OCD of moving furniture & organizing items. 
If you are anything like me, a budget comes into factor...which only makes this more exciting & special. Lucky for you, I always have a budget for rooms. My creativity and use of objects uncommon ways helps me to create rooms people love within their budgets! 

So, no that I have decided to do this, I need advice and guidance. I can research and read all I want on this topic but I want to hear from you! I want to know the thoughts of the people I would be working for. 

What do you think of this idea? 
Would you hire me? 
What do you want to see or know before you hire me?
How  much would you want to pay a decorator? 
What would you expect along the way of the decorating process?
Would you be okay with me using salvage and reclaimed items?


I want to do this the most cost effective way possible. I want to refurnish old items, turn items into pieces with unexpected uses and bring salvaged items into my decor. 

I picture you, my clients, to provide me with:
 -a budget
-color pallet
-favorite pattern(s)
-main wants/desires
-main dis-wants/ dislikes
-inspired images
-timeline 

I have read heaps on what to charge as a decorator. It varies from location along with how to charge.
Options for charging mainly consist of:
-hourly rate (included in clients budget)
-hourly rate (on top of clients budget)
-15%-30% percentage of budget
I would love your advice with this. What would you feel comfortable doing. There are many pros and cons to each method. 
I would honestly prefer the hourly payment but I want to be sure that my clients can use the major portion of their budgets on the decor. I do not want my clients worrying about what they will owe at the end. I would rather them be excited to see the final result & not dread the end cost of my time. 

What do you think is best? What would make you happy and want to choose me as your decorator over anyone else? 

okay, while I wait to hear from you wonderful, inspiring people, I better get to planning! So much to figure out! 

Also, please don't be shy! If you are at all interested in having me decorate any area of your home within your budget just shoot me an email @ ajo.adams@gmail.com. I will open to traveling within areas of Boston, MA & Venice, FL. 

Happy Tuesday!


DIY Palette & Coffee Cup Holder

17.3.15

Do you love wooden palette decor? So do I! 

While I was home visiting my family back in Venice, FL we did some DIY projects. My mom has a list of those she keeps just for me when I come now. 

My mom found on image of a coffee cup holder made from a palette. She found the image from Pinterest and pretty instantly sent it to me via Facebook asking me to make her one. I just wanted to thank Katelyn, the blogger of DIY Palette Coffee Cup Holder for her adorable little creation! My mom has received many compliments already. 


Once I told my mom I could make this for her I listed off the materials we would need. That is where we ran into trouble. My mom and step dad are not the handiest of people so I had to get creative with the tools I was using to create this. 

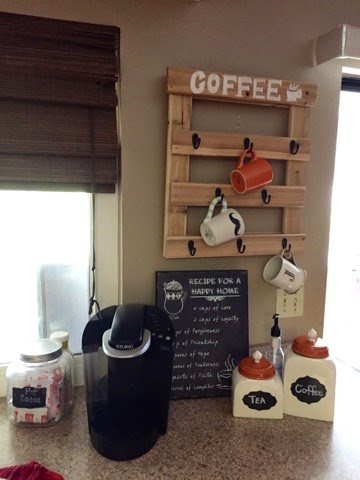
Here is a sneak peak of the final project!

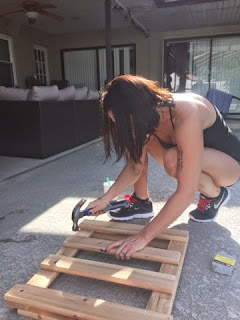
While I was doing yoga on their patio after a rather hot run for 8am I noticed a wooden bed frame over in the corner. They recently re did my little brothers room and took apart his bunk bed. They were planning on eventually just tossing the bed...this is like a gold mine for me! I love when people want to get rid of old wood! So I took apart the bed, which at the time my mom thought was nice of me to do...little did she know I was going to use the wooden slats from the bed to create her wooden coffee cup holder. Luckily my Nana had a saw, we found some sand paper and the rest of the materials we needed laying around. 

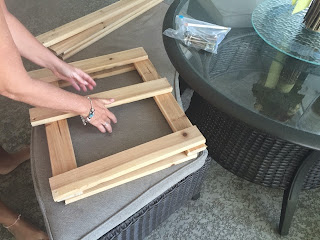
So we got to work! My mom and one of my sisters, Joeli, even helped out! 


Using a very old wobbly saw with no clams was an interesting way to cut wood...so we were checking lengths to be safe along the way. 

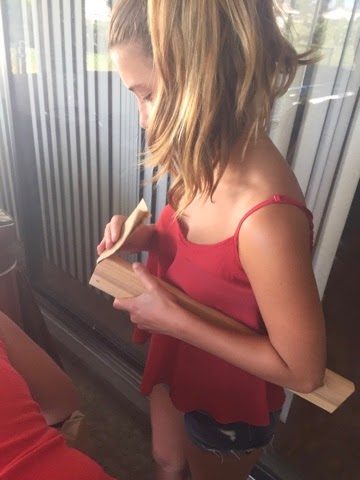
Joeli got to work sanding the ends that were cut just to be safe with all the kiddos in the house. 

Since it was suppose to resemble a palette, perfect is not in this DIY projects vocabulary. 
I used nails that had laying around and was not picky with their layout...some even bent in at the end of nailing....but it just added character :)

Hammering on this flooring was...not the greatest idea, but it got the job done. 

It held up! 
\

I really wanted a white paint sharpie but that was not in the cards for this moment so I used what I had. It worked, but to be honest I am not thrilled with the turn out on the writing. It was a chalky material that just got thicker as you used it which restricted fine lines. 
Here it is! The final outcome of our own version of the DIY Coffee Cup Holder. 

Have fun with your DIYs! Make them your own.

Made With Love By The Dutch Lady Designs