Showing posts with label budget friendly home decor. Show all posts

Darby Smart: diy air plant clock

8.2.16


Air Plants & Clocks: diy your own air plant clock 


Last year I joined Darby Smart and was hooked. 
Air plants were all the range on their site for 2015 and I joined in. 
So, I am going to show you my favorite home accent I designed using craft supplies from Darby Smart


First off, Good Morning! 
I hope that you are enjoying the strangely "warm" weather 
we are having for February, I sure am! 

I got on to Darby Smart and had the hardest time with narrowing down my first project. I could easily loose track of time on that site! I picked out some supplies and they arrived before I knew it. 

DIY Home Accent for under $20.00
I picked out:


I got right to work measuring out the layout of what I was picturing in my head. 

Inserted the clock parts to the wooden clock

Now the measurements. I use the embroidery loop to measure the level of the plastic.
I covered the smaller loop completely and the largerplac loop with a harsh angle 

placing the smaller loop on the wooden clock, than the larger loop with the angled plastic covering.

test out the layout & get it all figured out. This is where the lovely E-600 comes into play. Add a friendly amount of glue to the embriodery loops to secure the plastic. Than do the same to the wooden loops to secure to the clock and eacother. 

Allow this to dry while you load the laundry, put the kids to sleep, or run errands. Once it is all dry, you are good to add the rocks and air plant! 

Ta-Da! Here is your new air plant clock. 

I left the wooden natural but you can add your own designs, paint it, really whatever just be sure to leave enough room from your clock parts to the plastic so that your clock will work and not drag or catchy on the plastic. 

Air plant turnout...I kill all plants :) It is super hard to kill these. It is not like I took that as a challenge but let's just say air plant life is no longer in our home. You can learn all about how to care for an 
air plant in the product description and care listing on Darby Smart, or simply Google it :) 
You don't want that advice from me. 


Happy Monday! I hope this is good motivation for you on this lovely Monday. 

Later Loves. 

DIY Book Page Dahlia Medallion

14.4.15

I have found a new passion for the Dahlia flower. It is just simply beautiful! 

I am in the process of drawing one for my tattoo idea & while searching ideas, colors & all that jazz I found a DIY for one! 

Here is my Dahlia Medallion. 

Here is the jest of the materials that you will need to create your own.


an old book...choose the smaller one
some cardboard...I recommend something strong than the cereal box I used
scissors
tape, hot glue gun, stapler (w/ staples :)
x-acto knife or box cutter
& patience

I used a lid from a storage container to trace my circle. I would say I did a medium size circle...any larger and my medallion would be consider, well HUGE in my books. So trace that & cut it out. 

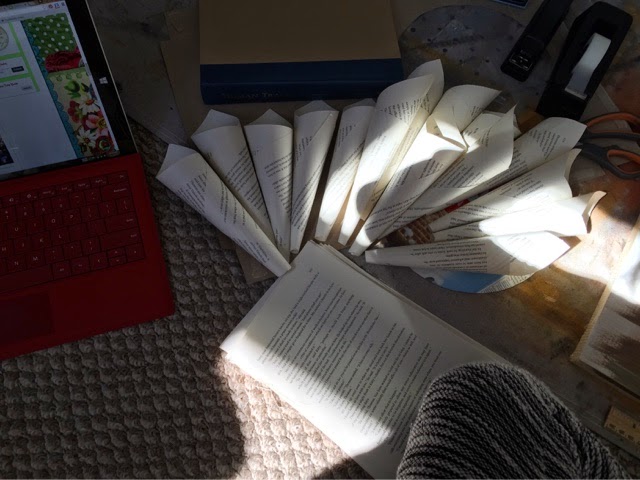
To get ready, cut heaps of pages from your book. Just run your X-ACTO knife along the edge of the binding of your old book. 

This might take a few rolls to get use to. Find a roll pattern that you like and can repeat over & over & over & over more times that you will want to. 
I held my pages horizontally & rolled from the left. 

Roll more than you think. My first circle held over 30 of these lovely little "petals".

Once you have a good amount you can start stapling them to your cardboard circle. Keep them close together, tight & the same distance around the entire circle.

I am not perfect either, no worries. It will still turn out beautiful! Just make sure you line up the tops of the "petals", don't worry too much about the area being stapled- not going to see it anyways! 

Okay, one (annoying) layer done! 
now the next....roll more as needed! I liked to get a bunch ready and than tape away. Yes, tape. You should probably hot glue or super glue but I wanted to get one made do have it. When I do this again I will be using my hot glue gun to hold this lovely creation together.
I did in total 5 rows of petal. I keep them all the same size besides my 5 row where I cut my pages in half. Rows 1-4 just adjust the petal in more for each row and glue in place. Make sure you put each row of petals between & lower the previous row.
For the center I cut one of the rolls way down and used the extra pieces inside of it to add the petaled look in the center of the flower. You could do whatever you want. Add a button, wire, metal, bottle cap, felt...the options are endless here- get creative! 
Yay! So fun! I loved the turn out. I can't wait to make another one! I want to do a set of three smaller ones with a metallic trim on the pages. 

Ryan & I decided to hang it here. 
It fit perfect & help with all the empty space we had above our TV & fireplace.

Make your own medallion.....or take the easy route & ask me to do it for you! Other fun options for these medallions coming soon! I want to hear your ideas or color requests too! 

If you are more of a step my step person be sure to check out Jennifer Kelly's Enchanted Petal blog on her How to make a Paper Flower Medallion. 
Made With Love By The Dutch Lady Designs