Happy New Year!

This year has been a
heck of a year! We moved from MN to MA, traveled to 10 countries including a 7
day cruise to start of 2015 with my family in FL, had a rather stressful
adventure renting out home back in MN and ending there year with 2 weeks in FL
doing a closet makeover. I know you came here for the closet makeover so I will
just get right to it.

When were weren't working on the closet, I spent time with my mom and sister drinking way too much Starbucks!

Ryan & I drew up
some plans and discussed our ides based off what my mom wanted, what we could
do with minimum tools and a rather low budget now that our tenant was oh so
kind to our home and payment (total sarcasm).
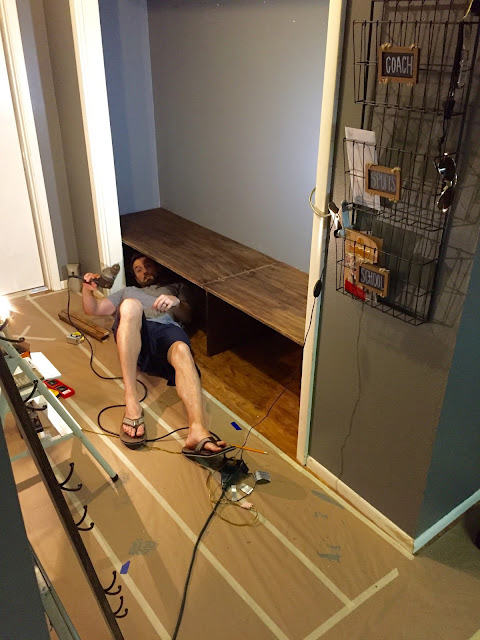
Here are photos of
the process of our closet makeover. I am a lazy blogger and do not really ever
share detailed step by step instructions. If that is something you want or have
questions- just comment below :) I would be happy to share more with you!


As the patches were
drying, some measurements were taken for double checking before purchasing wood
along with the taping before painting. Taping was annoying as taping it but it
got done! I also covered their wood floors with just rolls of paper for protection…mainly
because the kids were still using the door and of course managed to step in
paint!
After a few hours of
allowing the patch word to dry, using the same tool, the holes were simply
sanded sanded down. I didn’t really need to use the scraper besides once or
twice which you would do before you sand.


SCENTED PAINT!!!!
Painting time! The
paint I picked out was Mountain Smoke by Valspar.

I used Satin…I think…to help for easy clean up since it is a busy area of the house. 2 coats and some touch ups later, the walls were set to go! I jumped the gun as I normally do and hang up some pictures and signs my mom loves on one blank wall. The pantry closet in the kitchen was a bit…wrecked, so I painted that with chalkboard paint and drew on a calendar along with their Wi-Fi information and a little note bin.

A few days into
this, Ryan arrived and that is when we really got to work! We borrowed some
tools and hit Lowes up one rainy morning.

We knew that it shouldn't take that long but we have also learned that when we think that, our projects always end up taking 3 times as long as planned. We couldn’t let that happen this time. One, it was for to her people, it was their Christmas present and lastly…because we knew the "ugly sweater" party we were having on Dec. 23rd was actually a surprise get together for Tim (my brother) & Tori as we knew he was popping the question! She said yes so no worries! Ryan & I took the photos and I am happy to say they are beautiful!


We knew that it shouldn't take that long but we have also learned that when we think that, our projects always end up taking 3 times as long as planned. We couldn’t let that happen this time. One, it was for to her people, it was their Christmas present and lastly…because we knew the "ugly sweater" party we were having on Dec. 23rd was actually a surprise get together for Tim (my brother) & Tori as we knew he was popping the question! She said yes so no worries! Ryan & I took the photos and I am happy to say they are beautiful!
Here is a few favorites:


Okay for it is Dec. 20
and we have 2 days…but really 1 because Dec 21 is my sister Joeli's birthday….
We got our the
materials and had to have boards cut in order to fit them into my mom's small
Mercedes…challenge accepted & succeeded.
As Ryan measure and cut the boards, I out my sister and mom to work! We
worked on sanding all the boards and staining them. Of course we had dinner
plans with my grandma's and my dad that early evening so we didn't even get to
the building. The next day, Joeli's birthday, Ryan I got to work while having
some coffee. Joeli helped here and there. We were on a roll. Everything was
actually working! We took a lunch break and surprised Joeli to some lunch and
sweets at her top places. Sooner than later, we got right back to work! We
finished it all up that night!
 Did I mention Ryan
also fixed the front door handle as it hasn’t worked in like 5 or 6 years.
Apparently they had a "door guy" come to fix it but he couldn’t?
Anyways, Ryan got it done! Along with a new sink faucet that they have had for
3 years in the box - haha he took care of that too!
Did I mention Ryan
also fixed the front door handle as it hasn’t worked in like 5 or 6 years.
Apparently they had a "door guy" come to fix it but he couldn’t?
Anyways, Ryan got it done! Along with a new sink faucet that they have had for
3 years in the box - haha he took care of that too!
All while this
madness is happening. My brother, Joey took a good fall off a skateboard
leading to a fractured wrist. My sister Ellie spent my birthday in the ER super
sick…& they got a puppy for Christmas :)


Back to the closet
area. The smaller closet we planned to add a cute little gate to for a dog
kennel area..but they for a Dogue de Bordeaux puppy…which will group up to be
rather massive. We choose to not do the gate and just make it a dog food/ toy/
storage area. Turned out cute!
Here are the photos:


Dog Area Photos coming as soon as my mom sends them :)
We ending our FL vacation with best friends in Orlando, FL. They took us to explore St. Augustine and we feel in love! New pla, vacation home there!

Here are the photos:


Comparisons:


Dog Area Photos coming as soon as my mom sends them :)
We ending our FL vacation with best friends in Orlando, FL. They took us to explore St. Augustine and we feel in love! New pla, vacation home there!

Well, feel free to
comment, ask questions and share your thoughts!
See my new scarf on
my TOM & Orrow TRENDS BLOG HERE
SPECIAL EXTENDED
50% off for my blog
readers today ONLY!
Happy New Year!
No comments :
Post a Comment